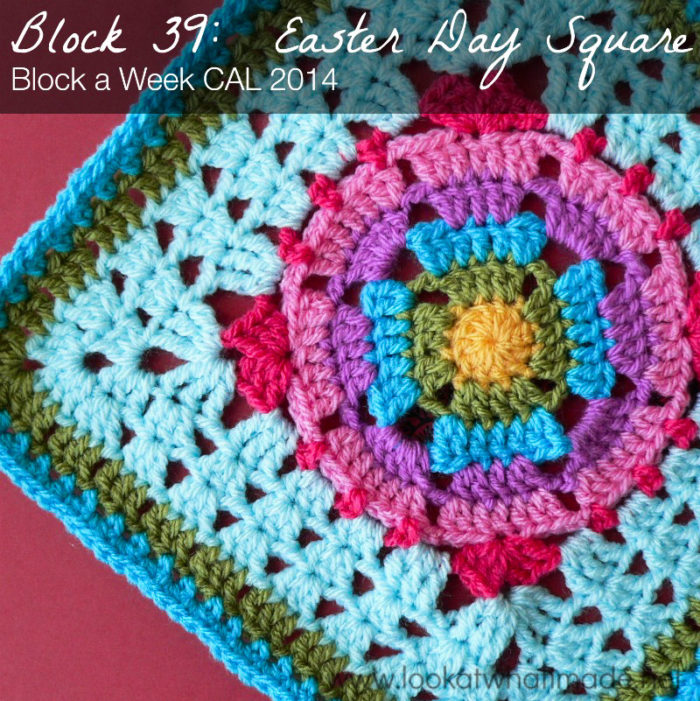
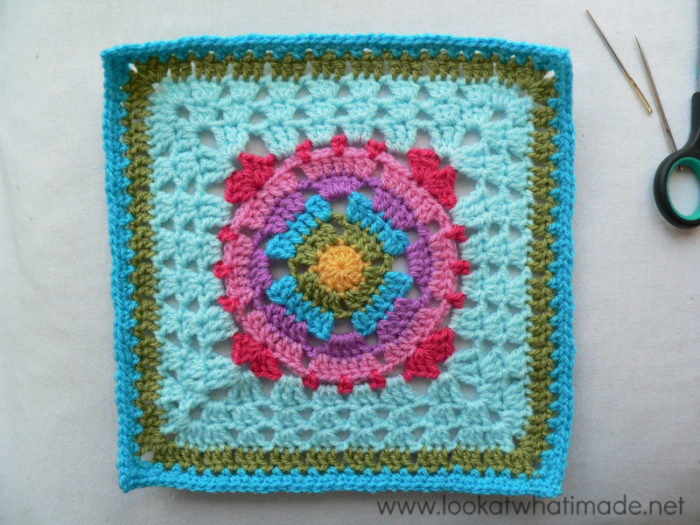
Block 39 of the Block a Week CAL (hosted by Kimberly Slifer) is Donna Mason-Svara’s Easter Day Square. This square is remarkably easy and I love how the central square turns into a circle and then back into a square. I also really like the twist on the traditional granny square, achieved by working into the central stitch of each 3-dc group instead of into the ch-1 spaces.

If you are using the same hook and yarn for all your squares, they will not all come out the same size. I have now added a post outlining the extra rounds I added to each square to get them to the size of Block 1, which was the biggest. You can find that here.
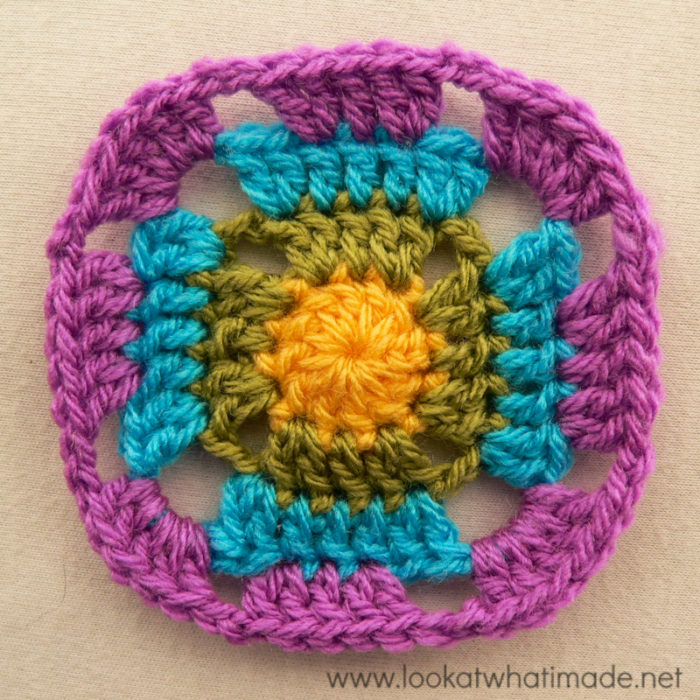
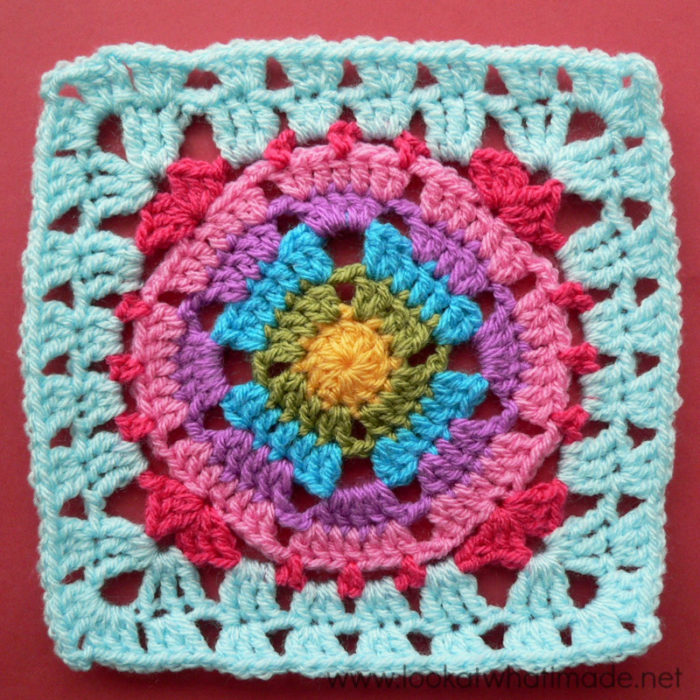
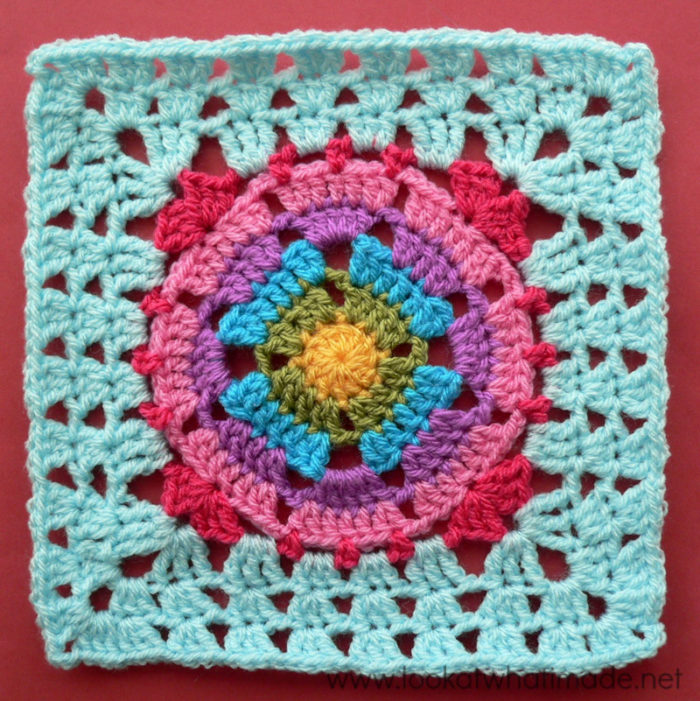
Easter Day Square
{Pattern © 2009 Donna Mason-Svara (aka SmoothFox). Photo tutorial done with kind permission}
Pattern
Available as a Free Ravelry Download.
Suggested Materials
- 5.5 mm Clover Amour Crochet Hook (US I/9 UK 5)
- Worsted weight yarn
Size
- Using the hook and yarn specified, your square should be a nice even 12″ when you are done.
- Using a 4 mm crochet hook (US G/6 UK 8) and double knit yarn, as I have done, your finished square will be about 7.5″ big.
My Yarn and Colour Choices
I am using Stylecraft Special DK.
- Saffron (Round 1)
- Meadow (Rounds 2 and 10)
- Turquoise (Rounds 3 and 11, and Optional Round 12)
- Magenta (Round 4)
- Fondant (Round 5)
- Pomegranate (Round 6)
- Sherbet (Rounds 7 – 9)
Notes
US Crochet Terminology used. (See this comparative chart if you need help transcribing from US to UK)
Corrections
Round 7: Stitch count reads (48 tr, 48 dc). It should be (24 dc’s, 48 tr’s, 20 ch-1 spaces, and 4 ch-3 corner spaces).
Round 10: ” (sk ch-1 sp, dc in next 3 sts, ch 1) repeat 7 times”. Total stitch count: 132, not 136.
Tutorial: I started Round 5 in the wrong 5-dc group from Round 4, causing my center to be rotated by 90 degrees. Thank you so much, Joyce, for pointing this out.
Easter Day Square Photo Tutorial
This photo-walkthrough is NOT the actual pattern and should not be used instead of the pattern, but rather in conjunction with it.
Thank you very much to Donna Mason-Svara for giving us permission to do this photo-tutorial for her Easter Day Square. And a special thank you to Kimberly Slifer for letting me do these tutorials and for obtaining the necessary permission.
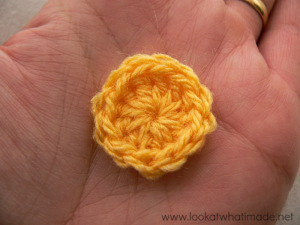
Round 1
 You can start this round with a magic ring instead of the initial ch-4 ring.
Magic Ring Instructions for Round 1
Into a magic ring: ch 3 (this counts as your first dc). Dc x 11 into the ring and pull the ring tight. Join to the top of the beginning ch-3 with a sl st.
If you feel like practising the invisible join I talked about last week, feel free to use it instead of the sl st join. Make sure that you understand which stitch to join to if you do use it!
If you are not familiar with working into a magic ring, this video tutorial from Moogly is clear and easy to follow.
Please remember, when working into a magic ring you HAVE to work away your initial tail very well. If you just cut it, your whole square might unravel!
Stitch count: 12 dc’s
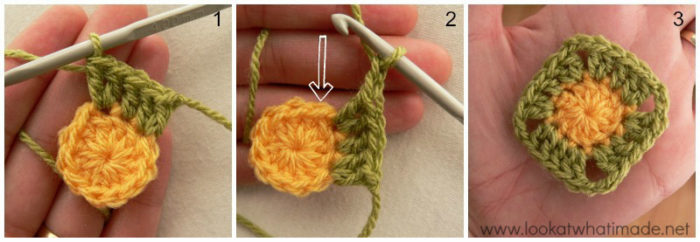
Round 2
- If you are using the same colour, ch 3 (counts as your first dc). Then make a dc in the same stitch.
- If you are using a new colour, join your yarn by making a standing double crochet in any stitch around. Then make another dc in the same stitch.
Dc in the next st and make 2 dc’s in the next st (Photo 1). Ch 2 (this counts as your corner) – see Photo 2.
(Make 2 dc’s in the next st, indicated with an arrow in Photo 2. Dc in the next st, make 2 dc’s in the next st, ch 2) three times. Join to the top of the beginning ch-3 (or the standing double crochet) with a sl st.
Stitch count: 20 dc’s and 4 ch-2 corner spaces {5 dc’s per side}
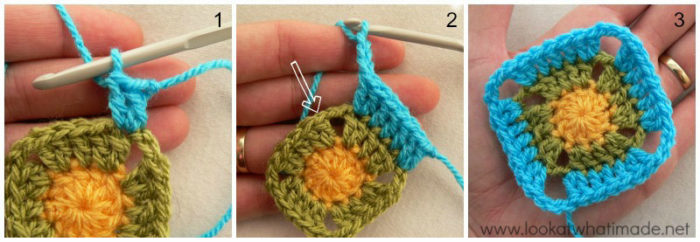
Round 3
- If you are using the same colour, ch 3 (counts as your first dc). Then make a dc in the same stitch.
- If you are using a new colour, join your yarn by making a standing double crochet in the first dc of any side. Then make another dc in the same stitch (Photo 1). If you do not know how to identify the top of the first dc, see this tutorial.
Dc in the next 3 st’s and make 2 dc’s in the next st. Ch 3 (this counts as your corner) – see Photo 2.
(Skip the ch-2 corner space and make 2 dc’s in the next st, dc in the next 3 st’s, make 2 dc’s in the next st, ch 3) three times. Join to the top of the beginning ch-3 (or the standing double crochet) with a sl st. Finish off!
Stitch count: 28 dc’s and 4 ch-3 corners
Round 4
Join your new yarn by making a standing double crochet in any corner ch-3 space. Make 4 more dc’s in the same space. This is your first corner made.
*Ch 2. Skip the first 2 st’s. Make 2 dc’s in the next st. Dc in the next st. Make 2 dc’s in the next st. Ch 2 and skip the last 2 st’s. Make 5 dc’s in the next ch-3 corner space.* Repeat from * to * 3 times, omitting the last corner on the last repeat. Join to the top of the standing double crochet with a sl st.
Stitch count: 40 dc’s and 8 ch-2 spaces
Round 5
Thank you very much to Joyce for pointing out that I have made an error in the tutorial.
Round 5 below should start in the first dc of any 5-dc group from Round 4 made into a ch-3 corner space. I started Round 5 in the first dc of a 5-dc group made into a 7-dc side from Round 4. My final center is therefore rotated 90 degrees to what it should be.
From here on out, therefore, my center will look different to the original pattern in the sense that the cross forms an X instead of a “+”. The remainder of the instructions are correct, and once you adjust the start of this round to follow the written pattern, your square will come out as it should.
As written.
This round is very similar to Round 3, except that you will have 8 repeats in total, not 4.
Stitch count: 56 dc’s and 8 ch-2 spaces
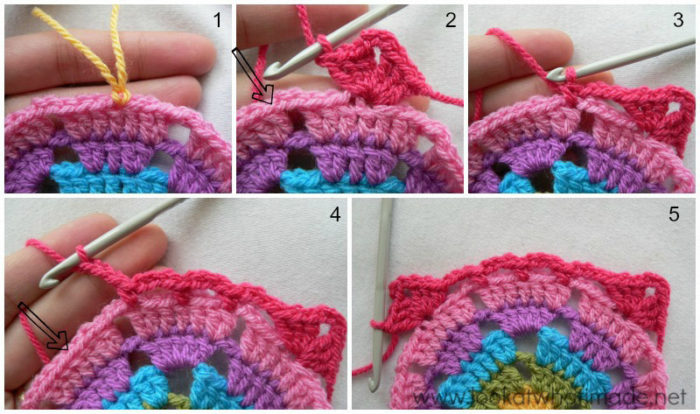
Round 6
- If you are using the same colour, sl st your way to the marked dc (see the hint in Round 5 above if you are unsure of which dc this is). (Ch 3, 2 dc, ch 3, 3 dc) in that central stitch. This counts as your first corner.
- If you are using a new colour, join your yarn by making a standing double crochet in the marked dc (which will be the central dc of any 7-dc side). (2 dc, ch 3, 3 dc) in the same space. This counts as your first corner (Photos 1 and 2).
* Ch 3. Skip the next 3 st’s and the ch-2 space. (Sc in the next st – see Photos 2 and 3. Ch 3 and skip the next 2 st’s) twice. Sc in the last st. Ch 3 (Photo 4). Skip the ch-2 space and the next 3 st’s. (3 dc, ch 3, 3 dc) in the next st. This is your corner made – see Photo 5.* Repeat from * to * 3 times, omitting the corner on the last repeat. Join to the top of the beginning ch-3 (or the standing double crochet) with a sl st.
Stitch count: 12 sc’s, 24 dc’s, and 20 ch-3 spaces {3 sc’s, 6 dc’s, and 4 ch-3 spaces per side – not including the corner ch-3 spaces}
Oooh…Pretty!
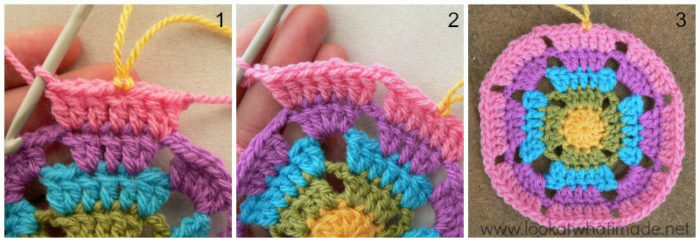
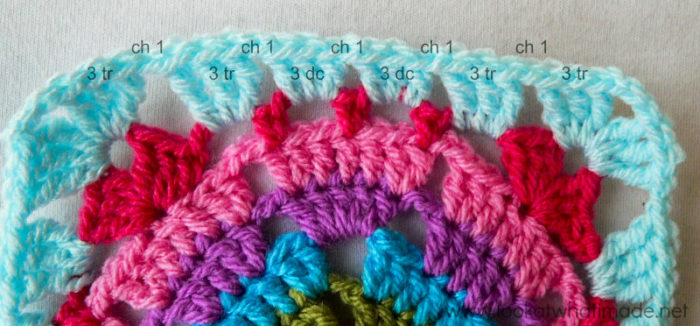
Round 7
As written.
If you are going to use a new colour, you can start with a standing treble crochet, which is the same as the standing double crochet, but with one more yarn over. If you find this too fiddly, just start with a (sl st, ch 4) as instructed.
You should end up with 2 3-tr groups and 2 3-dc groups per side (not including the corner stitches). Each of these should be separated by one chain stitch. Your corners will be (3 tr, ch 3, 3 tr).
Stitch count: 24 dc’s, 48 tr’s, 20 ch-1 spaces, and 4 ch-3 corner spaces {6 dc’s, 12 tr’s, and 5 ch-1 spaces per side}
Round 8
As written.
Each 3-dc group along the sides will fall in the central dc/tr from the previous 3-dc or 3-tr groups. Remember to chain one between 3-dc groups.
This round is sort of like a granny square, but working into the central dc’s/tr’s instead of working into the ch-1 spaces.
Stitch count: 96 dc’s, 28 ch-1 spaces, and 4 ch-3 corner spaces {24 dc’s and 7 ch-1 spaces per side}
Round 9
As written.
This round is a repeat of the previous round, but with 8 3-dc groups along each side, not 6 (not including corner stitches).
Stitch count: 120 dc’s, 36 ch-1 spaces, and 4 ch-3 corner spaces {30 dc’s and 9 ch-1 spaces per side}
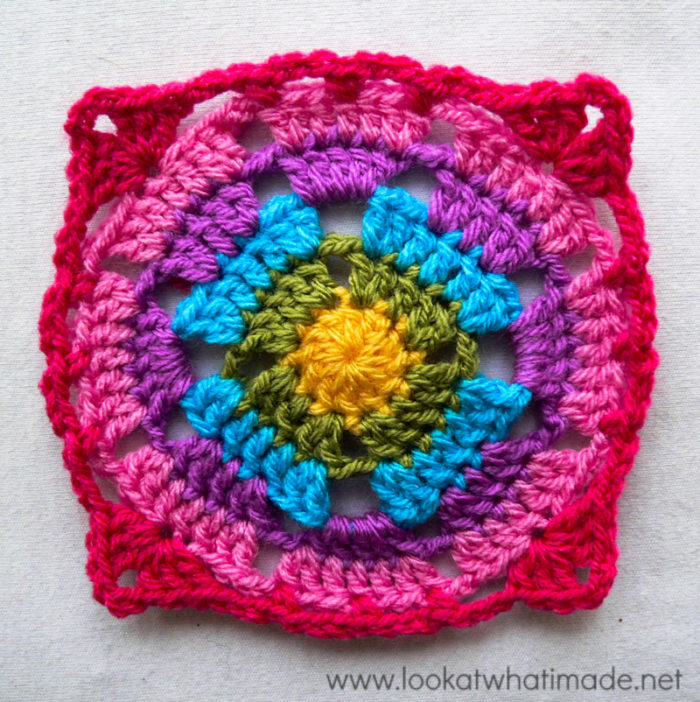
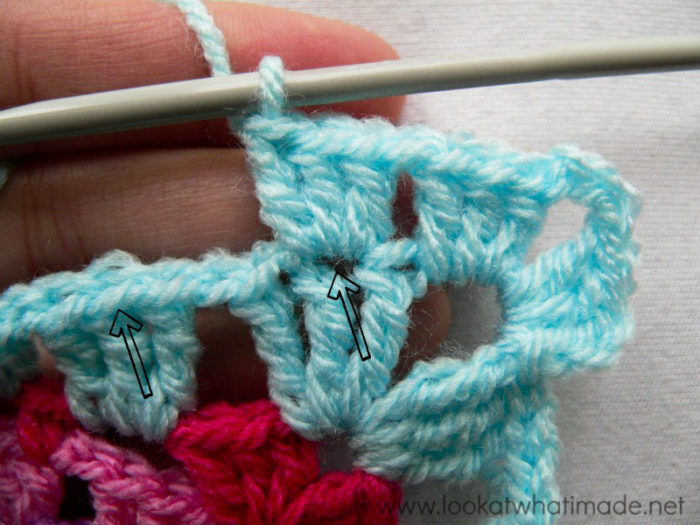
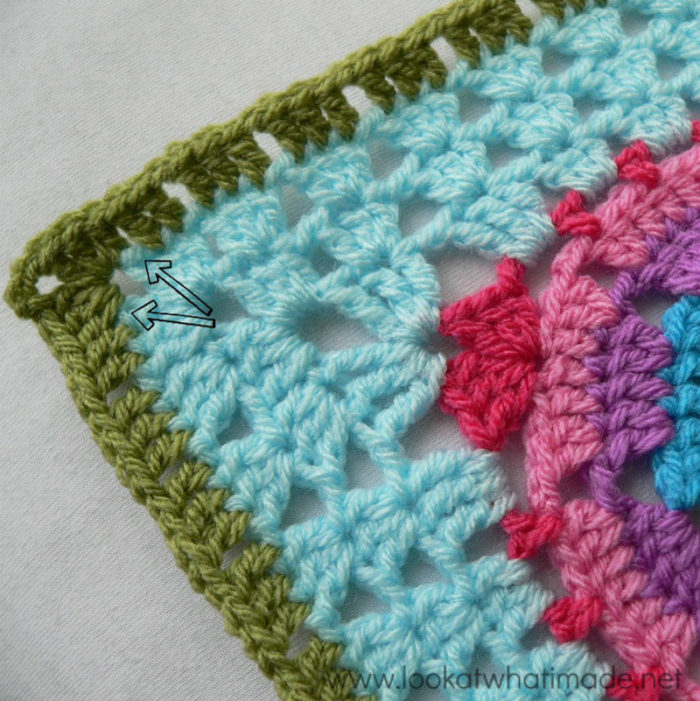
Round 10
As written (see Corrections above). You will be skipping the first and last stitch of every side (indicated with arrows in the photo below).
Stitch count: 132 dc’s, 36 ch-1 spaces, and 4 ch-3 corner spaces {34 dc’s and 9 ch-1 spaces per side}
Round 11
As written.
You will be skipping every second stitch or space in this round. It might help you to know that your sc’s will fall in the first and last dc of every 3-dc group across.
Stitch count: 100 sc’s and 84 ch-1 spaces {25 sc’s and 21 ch-1 spaces per side – including central corner sc}

Optional Additional Round
I have added an additional round to get my square to the same final round stitch count (and size) as the first one, which was the largest. You can find the instructions HERE.
Remember to subscribe to my Weekly Newsletter if you would like to be kept in the loop. You can also like my Facebook page or follow me on Bloglovin, Google+, Pinterest, Twitter, or Instagram.

Happy Hooking!


Sarah says
Just so you know, I selected your block because your “mistake” on round 5 made your square less predictable, more interesting (to me). Also, your instructions are written so very clear, appreciate that. Thank you!
Georgia says
Dedri, I would love to do an afghan using just block 39. Could you possibly tell me how to change colors, weave in and hide the tails as I go on this block?
Jenny says
Hi Georgia. Jenny here.
If you look at the pattern, Dedri has provided links to how to create the standing stitches required to change colours with this square :)
Joyce says
Correct me if I’m wrong, but are your 5 inner rounds turned 90 degrees, compared to the original pattern?
Dedri Uys says
Joyce, you are correct. I will have another look at what I missed and amend the tutorial. Thank you!
mary says
On one of your recent CAL blocks a crochet pattern titled Double Crochet Slip Stitch was mentioned. I looked for it
this evening and couldn’t find it. Could you guide me in the right direction?
I am enjoying the CAL blocks. The project is very intriguing and colorful!
Mary
Dedri Uys says
Hi, could you please tell me where you saw that term, because I do not recognize it as a viable stitch. It might be a typo, or are you referring to the standing double crochet?