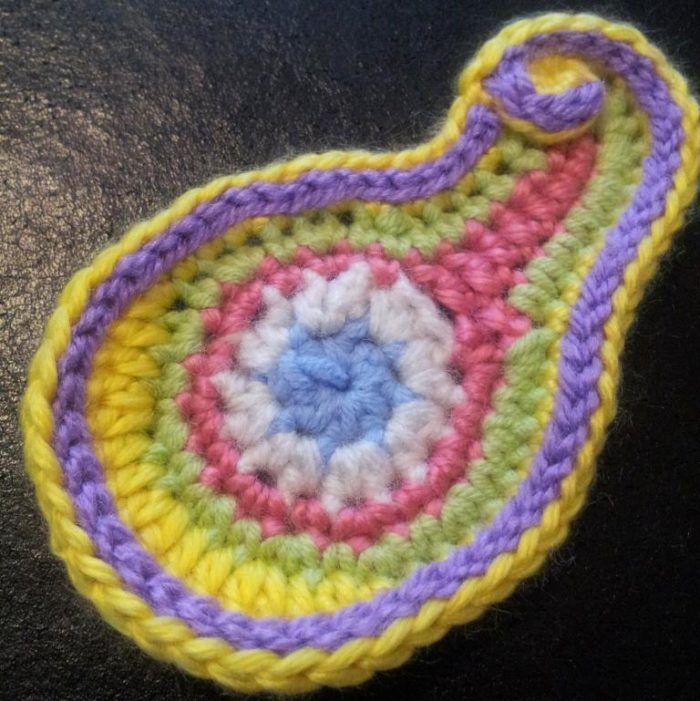
Good morning. We are all about the Paisley today. And so I bring you my Perfectly Paisley crochet pattern. I am very fond of paisley and can lose myself in the intricacies of some of the designs around. So when it came to designing a wing for my Mama Chicken, it just had to be Paisley.
But before I share the pattern with you I would just like to give a shout-out to my granny, who is 80 today!
Happy Birthday, Ouma!!! I hope that you have a lovely day and that you enjoy this weekend with the family on the farm in Kruisrivier. I wish we could be there!
Ps. Did anyone buy a 80w light bulb this year, or are you really going to put 80 candles on the cake?
Perfectly Paisley Crochet Pattern

Instructions
With 4mm crochet hook and double knit yarn:
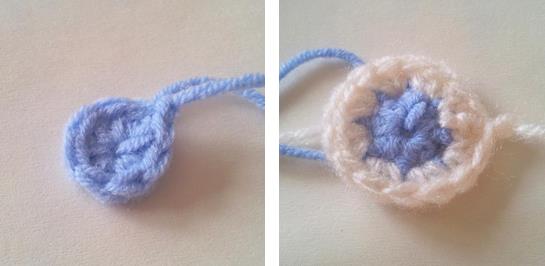
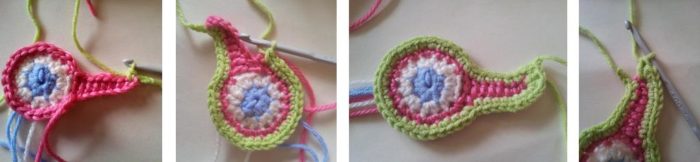
- Colour A: Into a magic ring: Ch 2, hdc x 7. Join to the top of the ch-2 with a sl st. Ch 1 and bind off. (8)
- Colour B: Join to any st around the circle with a sl st. Ch 2 and hdc in the same st. Hdc inc x 7. Join with a sl st to the top of the ch-2. Ch 1 and bid off. (16)
- Colour C: Join to any st around the circle with a sl st. Ch 9. Sc in 2nd ch from hook and next 2 ch’s. Hdc x 3, dc x 2. Skip the next 2 st’s of round 2 and sc in the 3d st. *sc inc, sc* x 6. Sc inc in the same st as joining in. Join with a sl st to the 2 remaining loops of the 1st ch st. (29 {39 if you count the remaining loops of the initial ch})
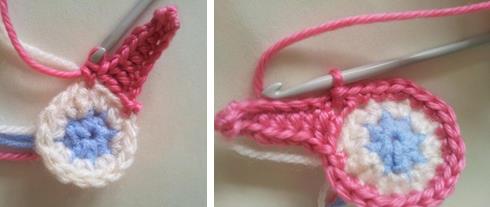
- Colour D: Ch 2. Sc in the 1st sc of the pointy bit. (Skip next, sc in next) x 2. Sc x 4. *sc, sc inc* x 10. Skip the first ch of the pointy bit (which already has a sl st worked into it). Sc x 4 (working into the remaining loops of the initial ch from round 3), sc inc x 2. In the last st: sc, hdc, dc. Join with a sl st to the 1st ch of the round. Ch 1 and bind off. (50 – including initial ch-2)
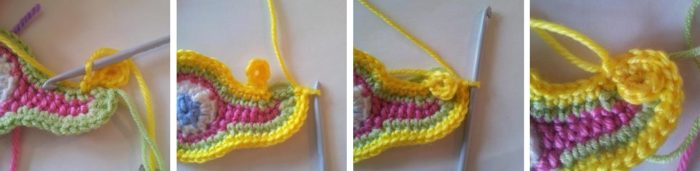
- Colour E: Into a magic ring: Ch 1, sc x 6. Join to the first st with a sl st. Ch 1. Sc into the 1st sc of the previous round (at the pointy end). Skip the next st, sc x 4, skip the next st, sc in the next. *sc inc, 2 x sc* x 2. Hdc inc, dc x 2. *dc inc, 2 x dc* x 3. Hdc, sc x 18. *sc inc, sc* x 2. Place the initial little circle on top of the pointy bit and sc through both the 4th sc of the circle AND the hole formed by the ch-2 of the previous round (so through both layers). Sc through the next 2 st’s of the circle AND the ch-2 hole. Sl st to the 1st st, ch 1 and bind off. (58 – not including the st’s of the magic ring and the first ch st)
- Colour F: Join your new yarn by working a surface sl st into the first sc of round 5. To work surface sl st’s, insert your hook from front to back and then from back to front around the post of the st. Yarn over and pull through both loops on the hook. Repeat for every st around. Don’t pull the stitches too tight, otherwise it will warp your work! When you get to the last st, work 4 more surface sl st’s into the st’s of the little circle. Ch 1 and bind off. Use the tail of yarn to secure the circle to the st’s underneath it.
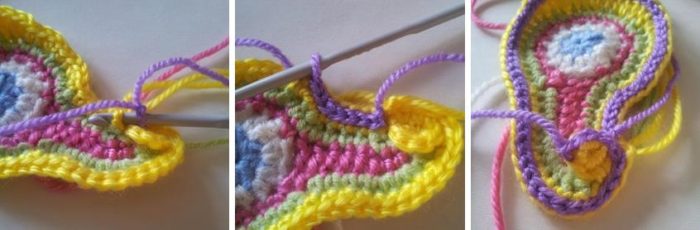
Alternatively, skip round 6 and use a running st to adorn your paisley thingy. Simply weave the yarn in one st and out the next until you get to the end. Then work around the little circle, attaching it to the stitches beneath by working your running st’s through both layers.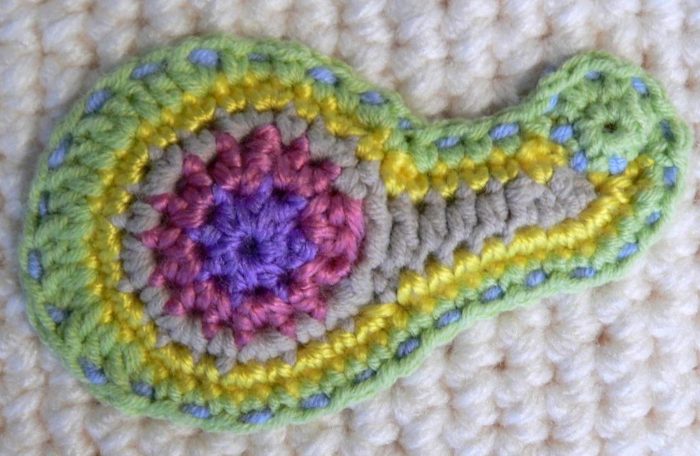
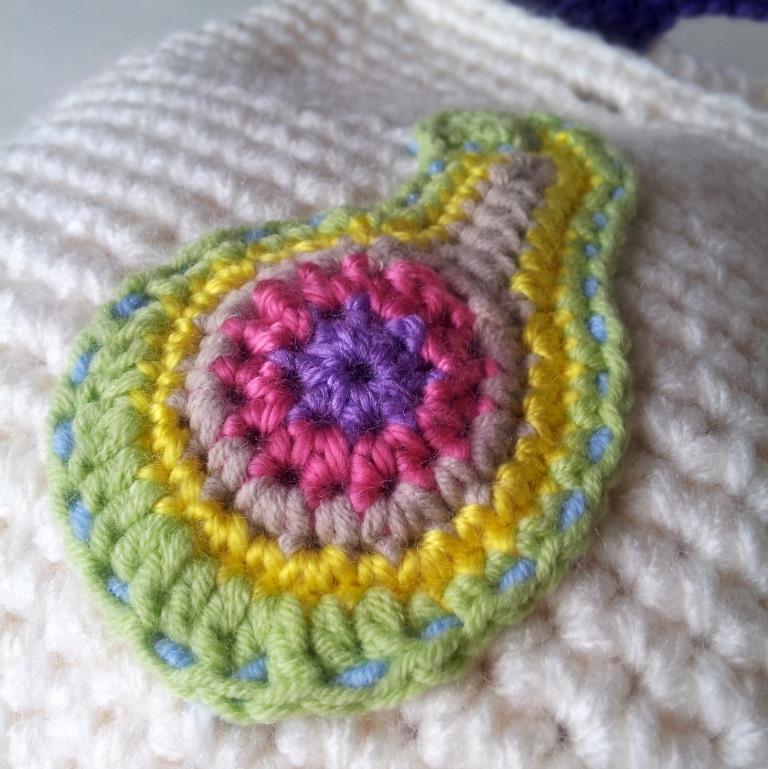
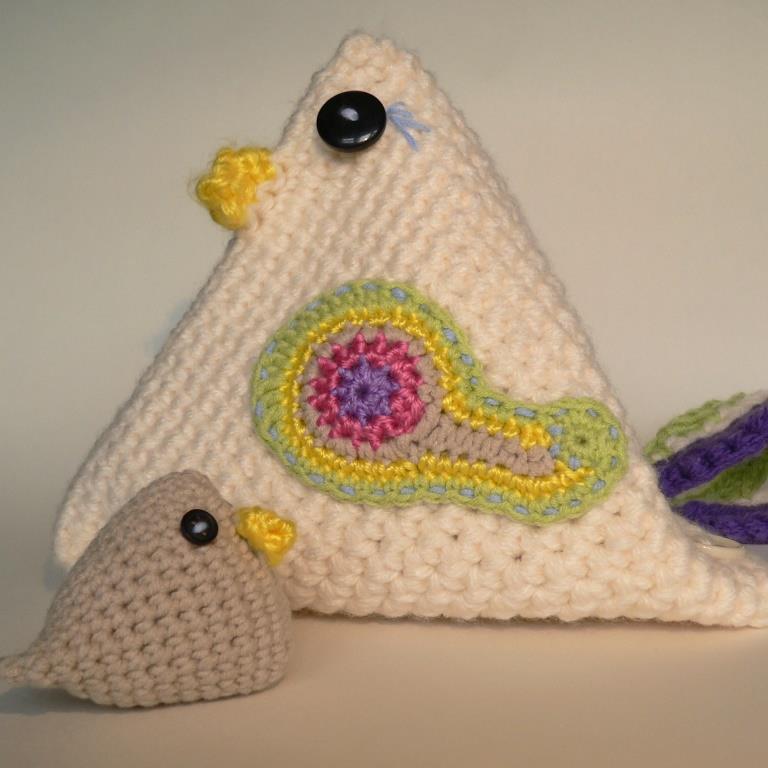
Here’s a little picture of Mama Chicken and her Perfectly Paisley wing.
Happy Easter and I hope you all have a blessed time with your families!
xxx dedri


Ludmila66 says
Они такие прелестные !!! Я тоже связала ! Спасибо!!