Part 2 of the “Joining Crochet Squares” series is a tutorial for joining your squares with a (sc, ch 1, skip 1) join. You can read Part 1 HERE if you need help deciding on layout, choosing colours, etc.
I will be joining the squares diagonally, so you should also get a fairly good idea of how diagonal joining works. This joining method is adapted slightly from the method my granny (on my father’s side) uses.
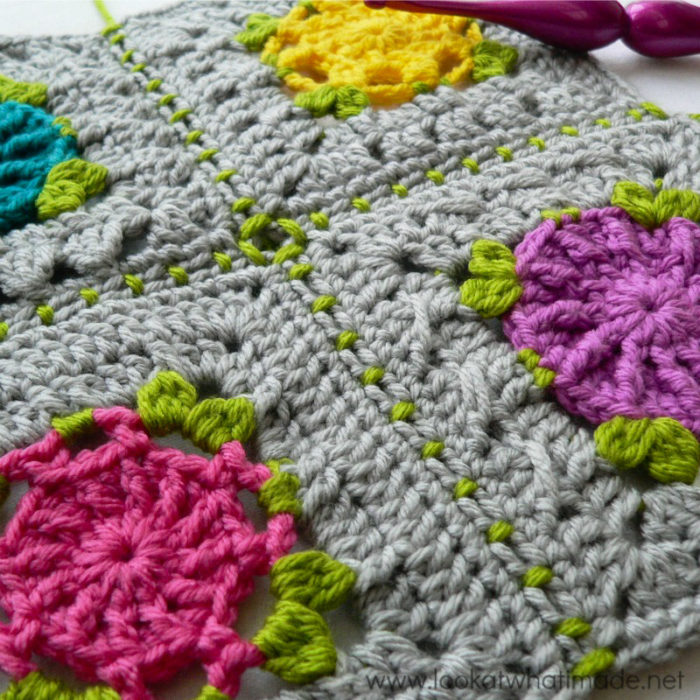
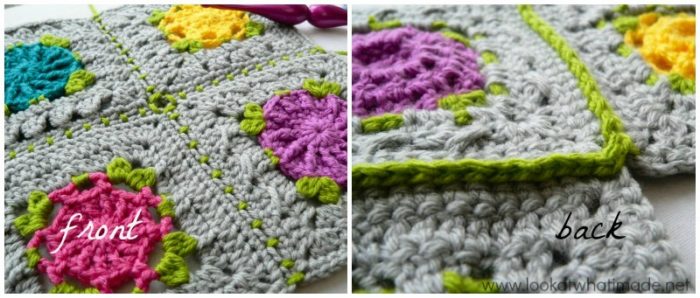
It yields a flat seam on the front of your work that will look like little stitches. On the back of your work the seam will be raised, but not as much as if you had made a sc in each stitch. This seam is reasonably elastic and would lend itself very well to attaching squares with different stitch counts.
It is very similar to this Visible Join by Zelna Oliver from Zooty Owl.
If you use the same colour for joining as for the last round of your squares, the stitches will form a helix-like pattern.

Joining Crochet Squares Diagonally Using (Sc, ch 1, skip 1) Join
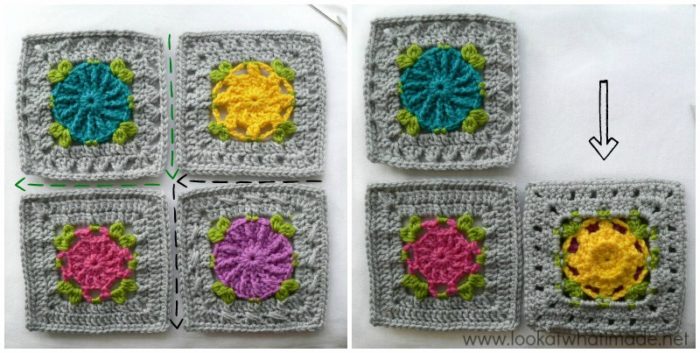
For the purposes of this tutorial I will only be joining 4 squares to each other.
In Part 1 of this series I spoke about deciding on your layout, so you should already know in which order you would like to attach your squares.
To join on the diagonal, you will start with the bottom right square (bottom left if you are left-handed) – the square with the purple center below. You will be attaching it to the square above it first (yellow center), followed by the square directly next to it (pink center) – see black arrows below.
So flip the square above the corner square over onto the corner square so that their right sides are facing each other.
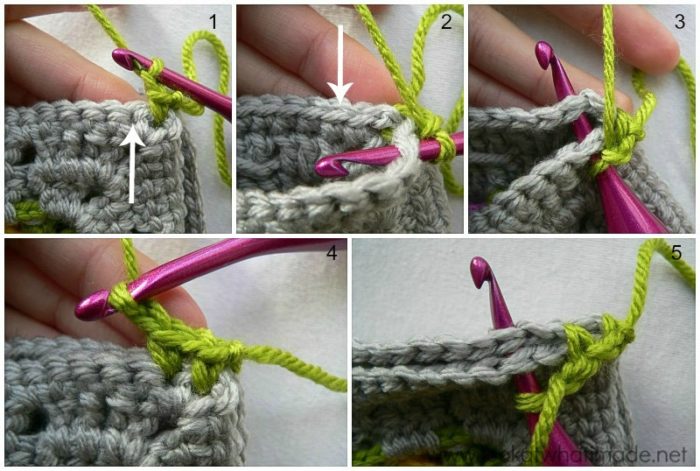
With a slip knot already on your hook and starting in the corner space, make a sc through both layers of the ch space. Ch 1 (Photo 1). Insert your hook into the first st of the square closest to you (indicated with an arrow in Photo 1). Insert your hook into the second st of the square furthest away from you (indicated with an arrow in Photo 2 and illustrated in Photo 3). Make a sc through both layers.
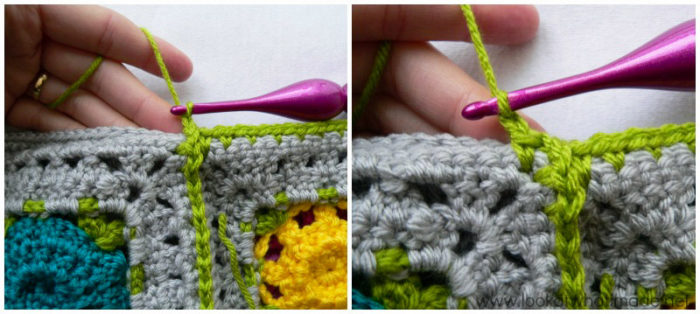
*Ch 1 (Photo 4), skip the next st of both layer, and sc through the next st of both layers (Photo 5).*
Repeat from * to * until you get to the next corner space.
It doesn’t matter if you have an even number of stitches or an odd number. If you have an even number of stitches, your last sc before the corner will fall in the second to last sc of the side for the top layer, and in the last sc of the side for the bottom layer. If you have an uneven number of stitches, your last sc before the corner will fall in the last sc of the side for the top layer and in the second to last sc of the side for the bottom layer.
Into the corner space (sc, ch 1) through both layers (photo below left). Unfold your squares (photo below right). 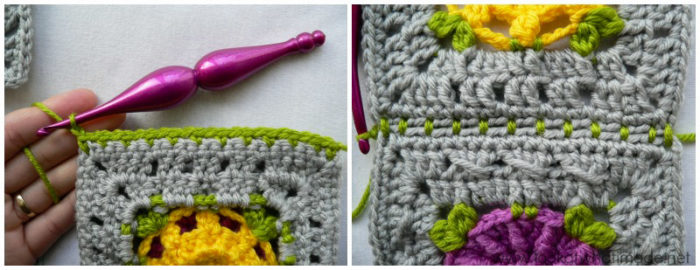
Now that you have attached the square above the corner square, you need to attach the square next to it (pink center). So flip that square over onto the corner square (as before). 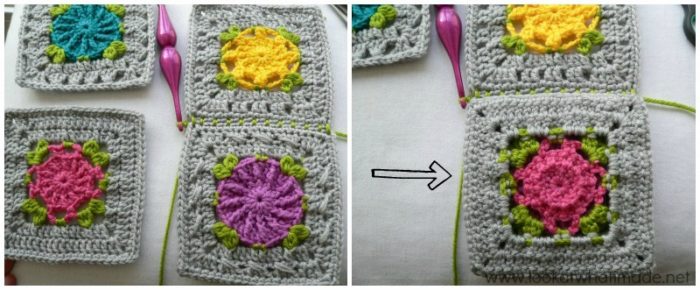
Insert your hook into the corner space of the top square (indicated with an “a” below) and then insert it into the corner space of the bottom square (indicated with a “b” below). Make a sc through both layers and ch 1 (Photo 2). Make a sc through the first st of the top layer and the second st of the bottom layer (Photo 3). *Ch 1, skip the next st of both layers, and sc through the next st of both layers*. Repeat until you get to the corner space. (Sc, ch 1) in the corner space. Fasten off and pull the ch st tight to form a little knot (Photo 5).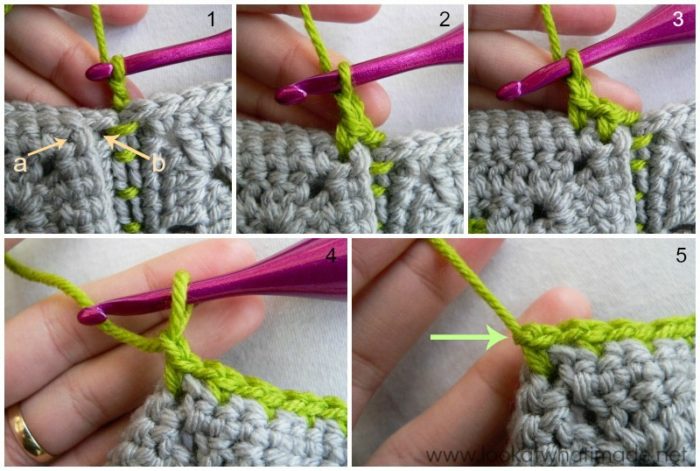
Unfold the squares again. We will now attach the last of the 4 squares.
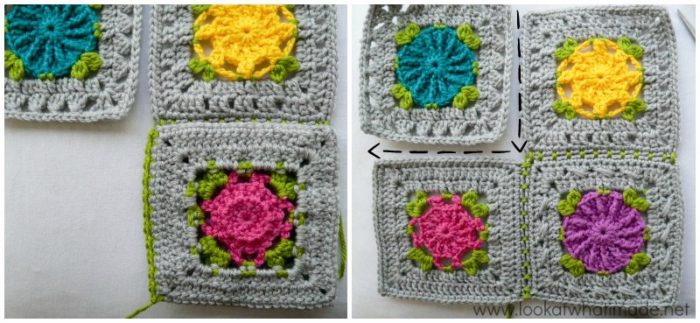
Fold the last square over onto the top right-hand square. Using the same stitch repeat as before, join the two squares together.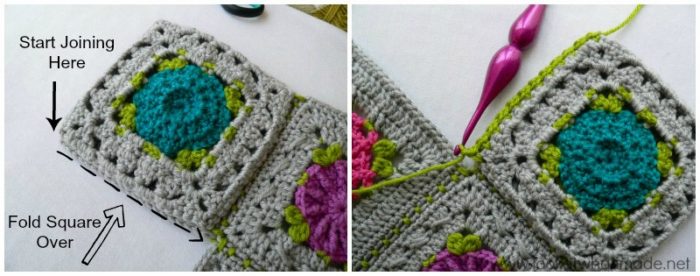
Once the one side is joined, unfold the squares (photo below left) and then fold the top two squares down onto the bottom two.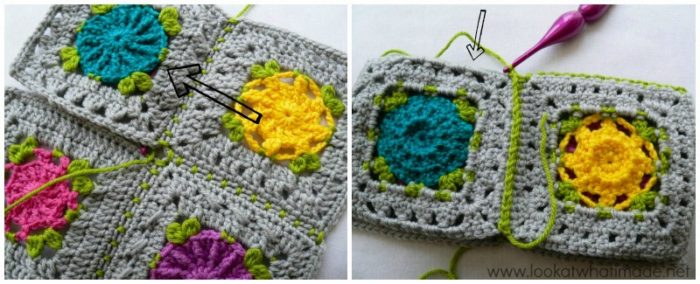
Before you can join the last side, you need to anchor your work to the corner created when you joined the first (purple) square to the other two (yellow and pink). To do this, sl st into the ch-1 space at the corner of the join from the previous squares. When you have made the sl st, ch 1. This is your corner made.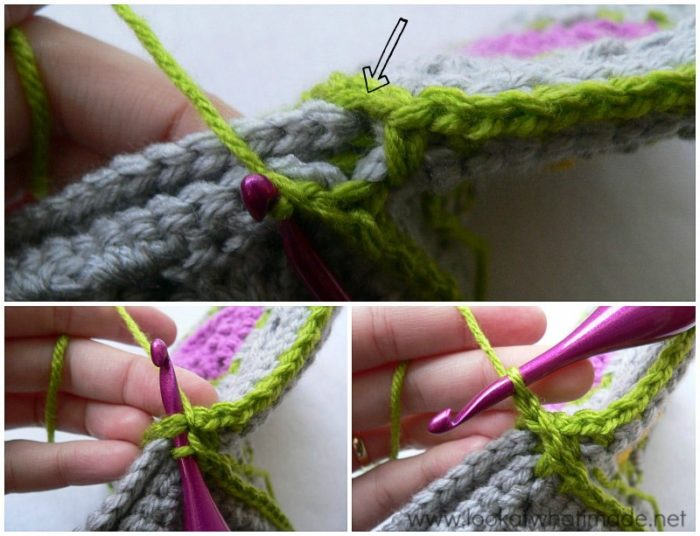
Insert your hook into the corner space (through both layers as before) and make a sc.
Continue with the (sc, ch 1, skip 1) seam as before. When you have joined this last side, fasten off as before and open up your square.
This method of joining 4 squares to each other is what I will be using to join my afghan for the Block a Week CAL 2014. I will be telling you more about these 4-squares in Part 5 of this series.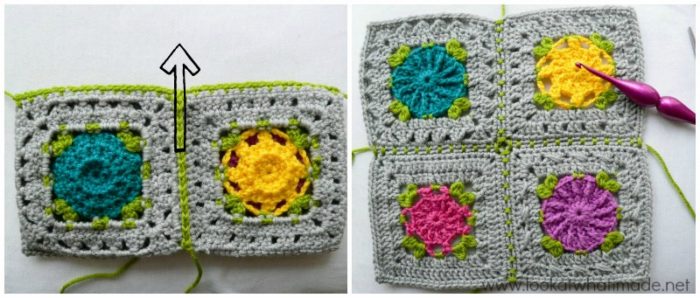
If you are using this method to attach 9 or more squares, you will continue adding squares in a diagonal fashion, like steps. You will always start joining top right (top left if you are left-handed) and end bottom left (bottom right if you are left-handed).

Just to remind you what I have in store for the next fortnight:
- Part 1: Preparing to Join Your Afghan
- Part 2: (Sc, ch 1, skip 1) Join – This Post
- Part 3: Different ways to Join – a comprehensive list of joining techniques
- Part 4: Joining Squares With Different Stitch Counts
- Part 5: Making Foursquares
- Bonus: Betty’s Beautiful Border

This blog post contains affiliate links. I only link to products I personally use or would use. All opinions are my own.


Steffi says
Thank you for your detailed guide and for keeping it online!
Patty says
This join looks fun and beautiful. Your detailed pictures are really helpful too. I would love it if you also made a video of how to do it. I’m going to try it even though I’m more of a visual learner. Thank you for sharing your talent.
Jenny Lowman says
This is my favourite join, Patty. It looks great in a contrast colour on blankets! :)
Laura Fransen says
Is there a video tutorial of this anywhere?
Jenny says
Have a Google and see if there is, Laura. I am sure there must be joining videos on YouTube. Jenny :)
Jacqueline says
Thank you!! I am just about to finish slip stitching my first blanket using the diagonal method. I LOVE it! I had to break off working to post and say. So much quicker. So much easier. I haven’t had to use irritating stitch markers to hold pieces together in order. And the blanket feels sturdy as you work, rather than worrying about stretching joins.
Another few hours and then back to the Namaqualand blanket. Loving that too!
Dedri Uys says
Oh yay!!! I do love the diagonal method :) I’m so pleased you like it too.
Kristina says
OMG!!! thank-you for sharing this – I just found your site today (Mar 06 2017) – referred here by Ravelry.com member who use it to join her knitted quilt.
Your tutorial is perfectly detailed and I hope to use it often.
Please do not remove it…. it’s a gem
Dedri Uys says
Thank you, Kristina :)
Susanna says
Great join and great instructions! This is just what I needed to join some,squares for a Christmas tree afghan I am making. So easy. Thank you!
Dedri Uys says
Thank you, Susanna ;)
Jane says
Love these crochet squares. Very cute!
Sheila Willis says
what yarn do you use for the weekly square?
Dedri Uys says
Sheila, I am using Stylecraft Special DK. The details of the yarn can be found in each of the 48 tutorials for the Block a Week Squares.
Kathryn at Crafternoon Treats says
What a super useful post – I am doing a hexagon blanket as a join as you go project but I will certainly save this for a squares blanket I have planned xxx
Dedri Uys says
Ooh…is your blanket on your blog, Kathryn?
Brenda Joy says
I love this! And I am almost done with my 12 Sophia Garden blocks for the twin size spread I am making. I was wanting a fast joining processes that will lay flat. I’ll post pictures on facebook when I’m finished.
Dedri Uys says
Brenda Joy, I can’t wait to see your blanket!